# Create a Workato integration user in SAP
Creating a Workato integration user in Sap consists of the following steps:
- Create a new user in SAP using SU01
- Activate your newly-created Workato user
- Create a Workato Integration Role using PFCG
- Link your user to your newly-created role
# Create a new user in SAP using SU01
To begin, you must first create a user in your SAP system which is dedicated to Workato. This user is used later on with the minimum required permissions to run your integrations.
RECOMMENDED USER TYPE
We recommend you use the Communication user type in SAP. This is reserved by SAP for dialog-free communication between systems (through RFC) and does not provide GUI access.
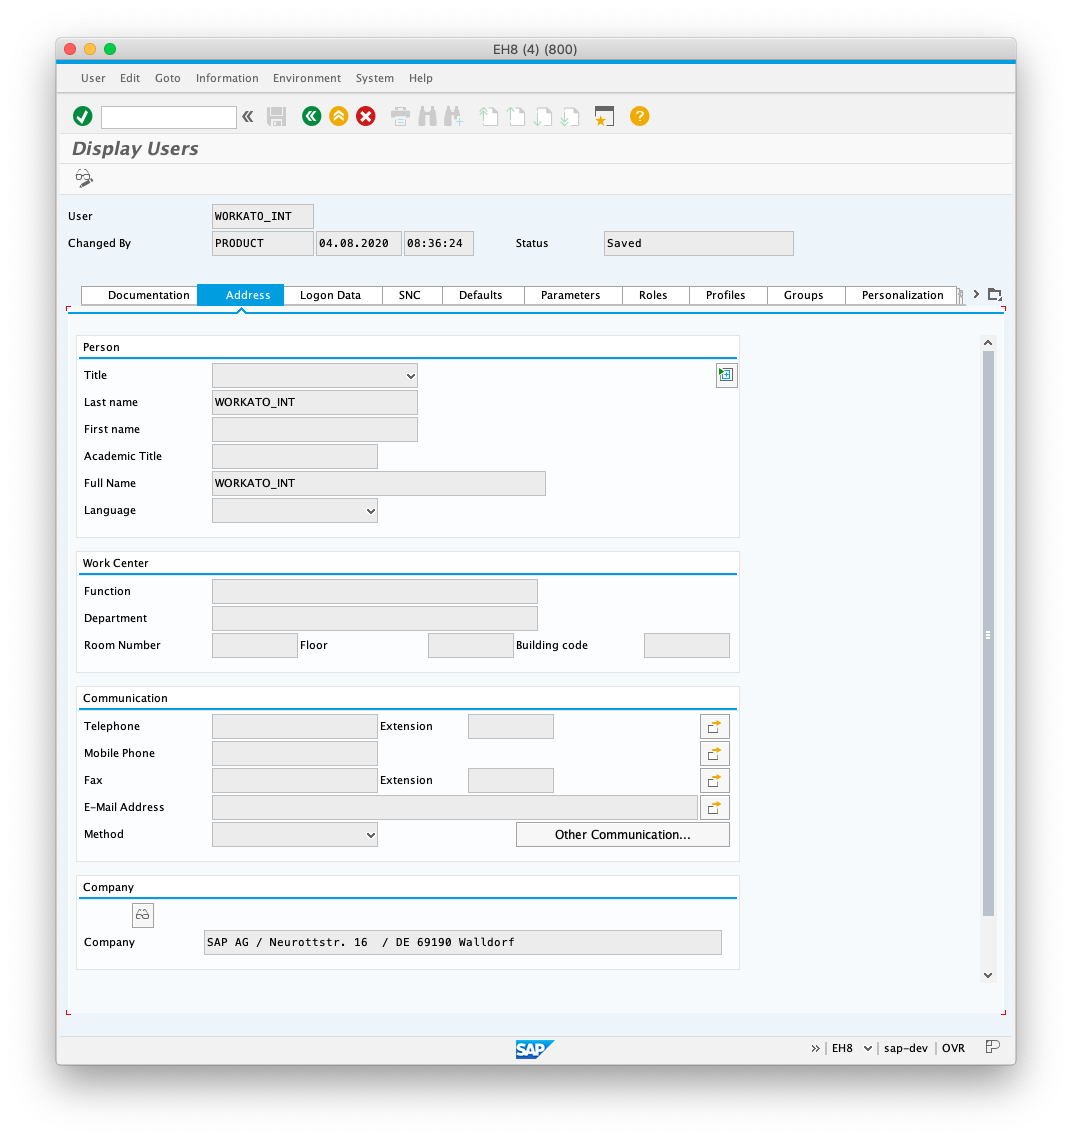
In t-code SU01, give the new user a name that is relevant to Workato. In the following example, we have named the user WORKATO_INT.
When creating a user, you must provide a Last name and password. These are located in the Logon Data tab.
USER PERMISSIONS
This user's permission dictates which RFCs Workato can run and which IDocs Workato can send and receive.
# Activate your newly-created Workato user
After creating your new user, you must activate this user by logging in to SAP as this user and changing the password. Take note of both the password and the username as they're required to set up your OPA in Workato.
# Create a Workato Integration Role using PFCG
Assign a role to this newly-created user. This role grants access to specific objects in your SAP system. This guide demonstrates how to configure the minimum authorizations required to connect to SAP from Workato.
USER PERMISSIONS
These instructions do not include authorizations required to run any RFCs, receive IDocs, and send any IDocs required for the connector. To determine the permissions required to run actions and triggers in Workato reference the minimum permissions section of this guide.
Navigate to t-code PFCG and type in the role to assign to this Workato user. In our example, we have name the role Z_WORKATO_MIN_AUTH.
Select the Single role button after providing your chosen name.
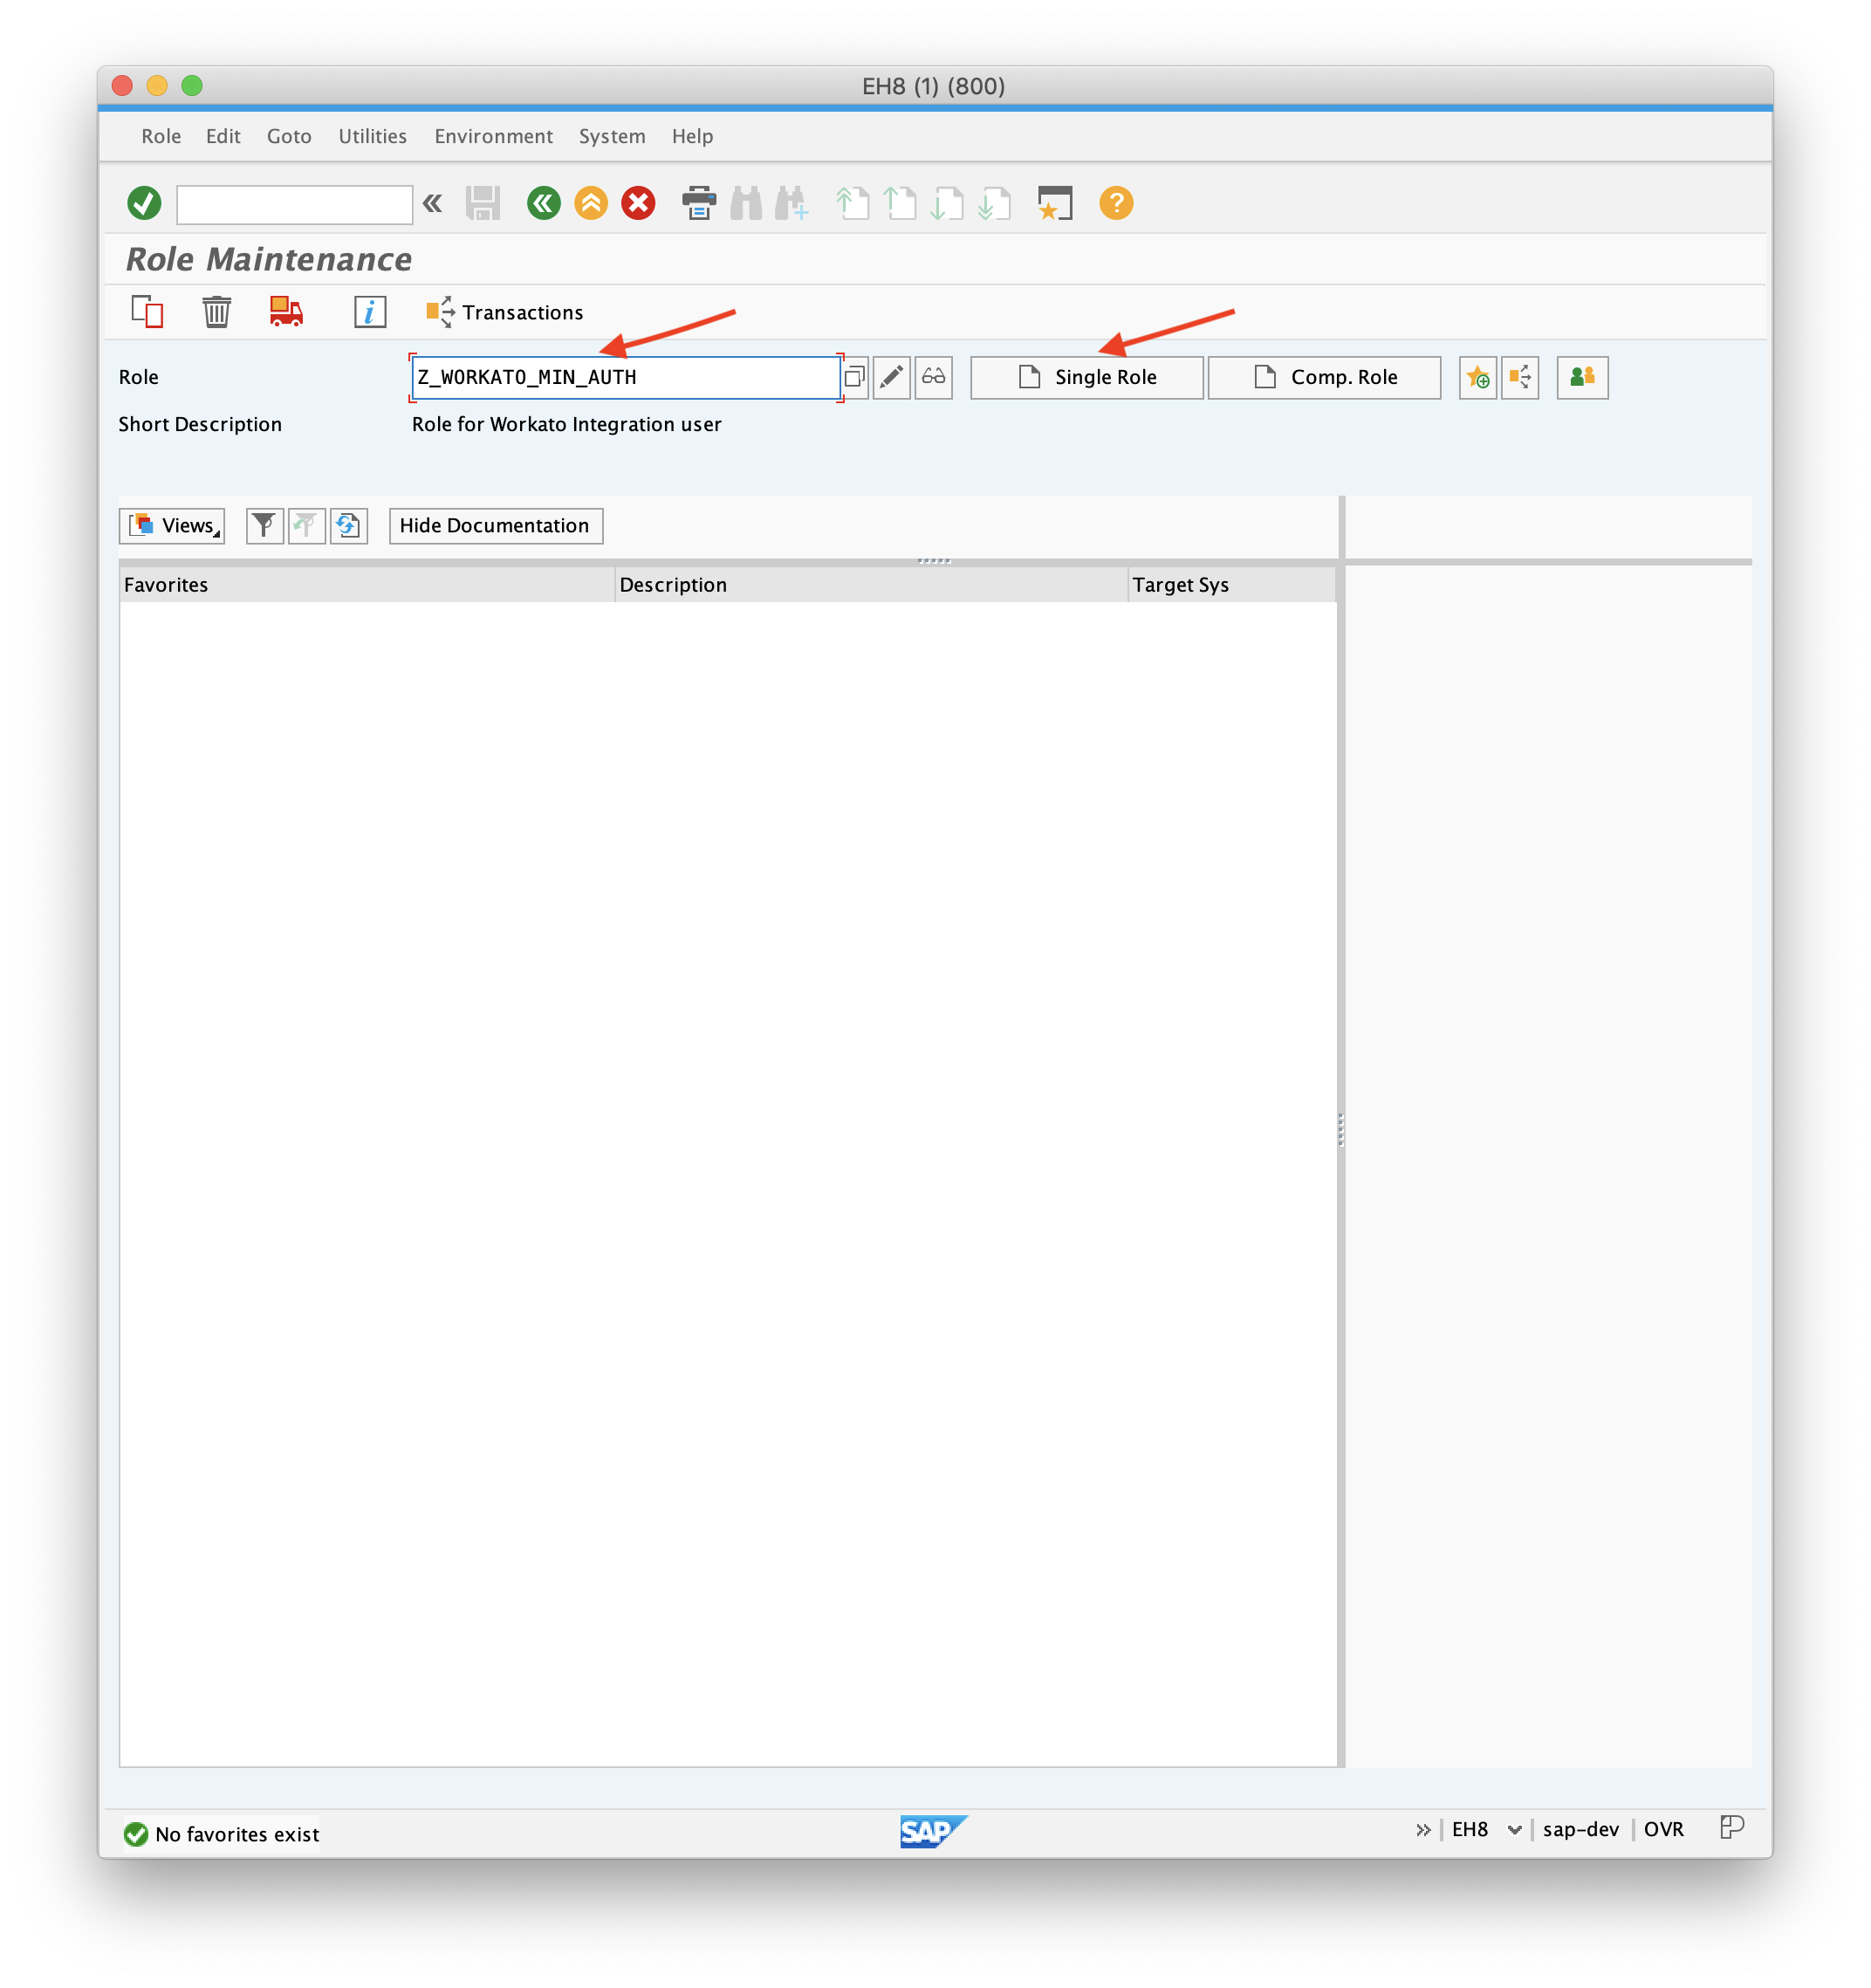
Give you new role a description.
Navigate to the Authorizations tab. Generate a profile by selecting the button next to the Profile Name input field.
After the profile is generated, select Change Authorization Data. You must assign the following permissions. These permissions help the Workato connector with Authentication and reading metadata from your SAP system. Assign permissions by maintaining the role manually with the button located in the top section of the interface.
Authorization objects to add
- S_RFC
- Required to authorize Workato to call certain function groups and modules.
- S_TABU_DIS
- Determines which group of tables using authorization groups users can access.
- S_TABU_NAM
- Determines which exact table(s) users can access. This authorization object permits users to access a specific table within an authorization group that they otherwise cannot access.
RFC object types for S_RFC (Activity=16)
- FUGR
- RFC object type
- RFC_NAME
- RFC object name
- Possible values:
- EDIMEXT
- RFC2
- RFC_METADATA
- SDIFRUNTIME
- SDTX
- SVRZ
- SYST
- ARFC (Only required if sending IDocs)
- EDIN (Only required if sending IDocs)
- FUNC
- RFC object type
- Name of RFC object (RFC_NAME)
- DDIF_FIELDINFO_GET
- GET_SYSTEM_NAME
- IDOCTYPES_LIST_WITH_MESSAGES
- RFCPING
- RFC_FUNCTION_SEARCH_WITHGROUP
- OCS_GET_INSTALLED_SWPRODUCTS
- RFC_READ_TABLE
- API_CREATE_TID (Only required if sending IDocs)
- IDOC_INBOUND_ASYNCHRONOUS (Only required if sending IDocs)
Authorization objects for S_TABU_DIS object
- S_TABU_DIS (Activity=02,03)
- Table authorization group (DICBERCLS):
- SA
- SC
- SS
Authorization objects for S_TABU_NAM object:
- S_TABU_NAM (Activity=02,03
- Table authorization group (DICBERCLS):
- EDIPOA
- EDP13
- EDP21
- RFCDES
- TAPLT
- TBD05
- TFDIR
- TFTIT
Your final Authorization should look like this:
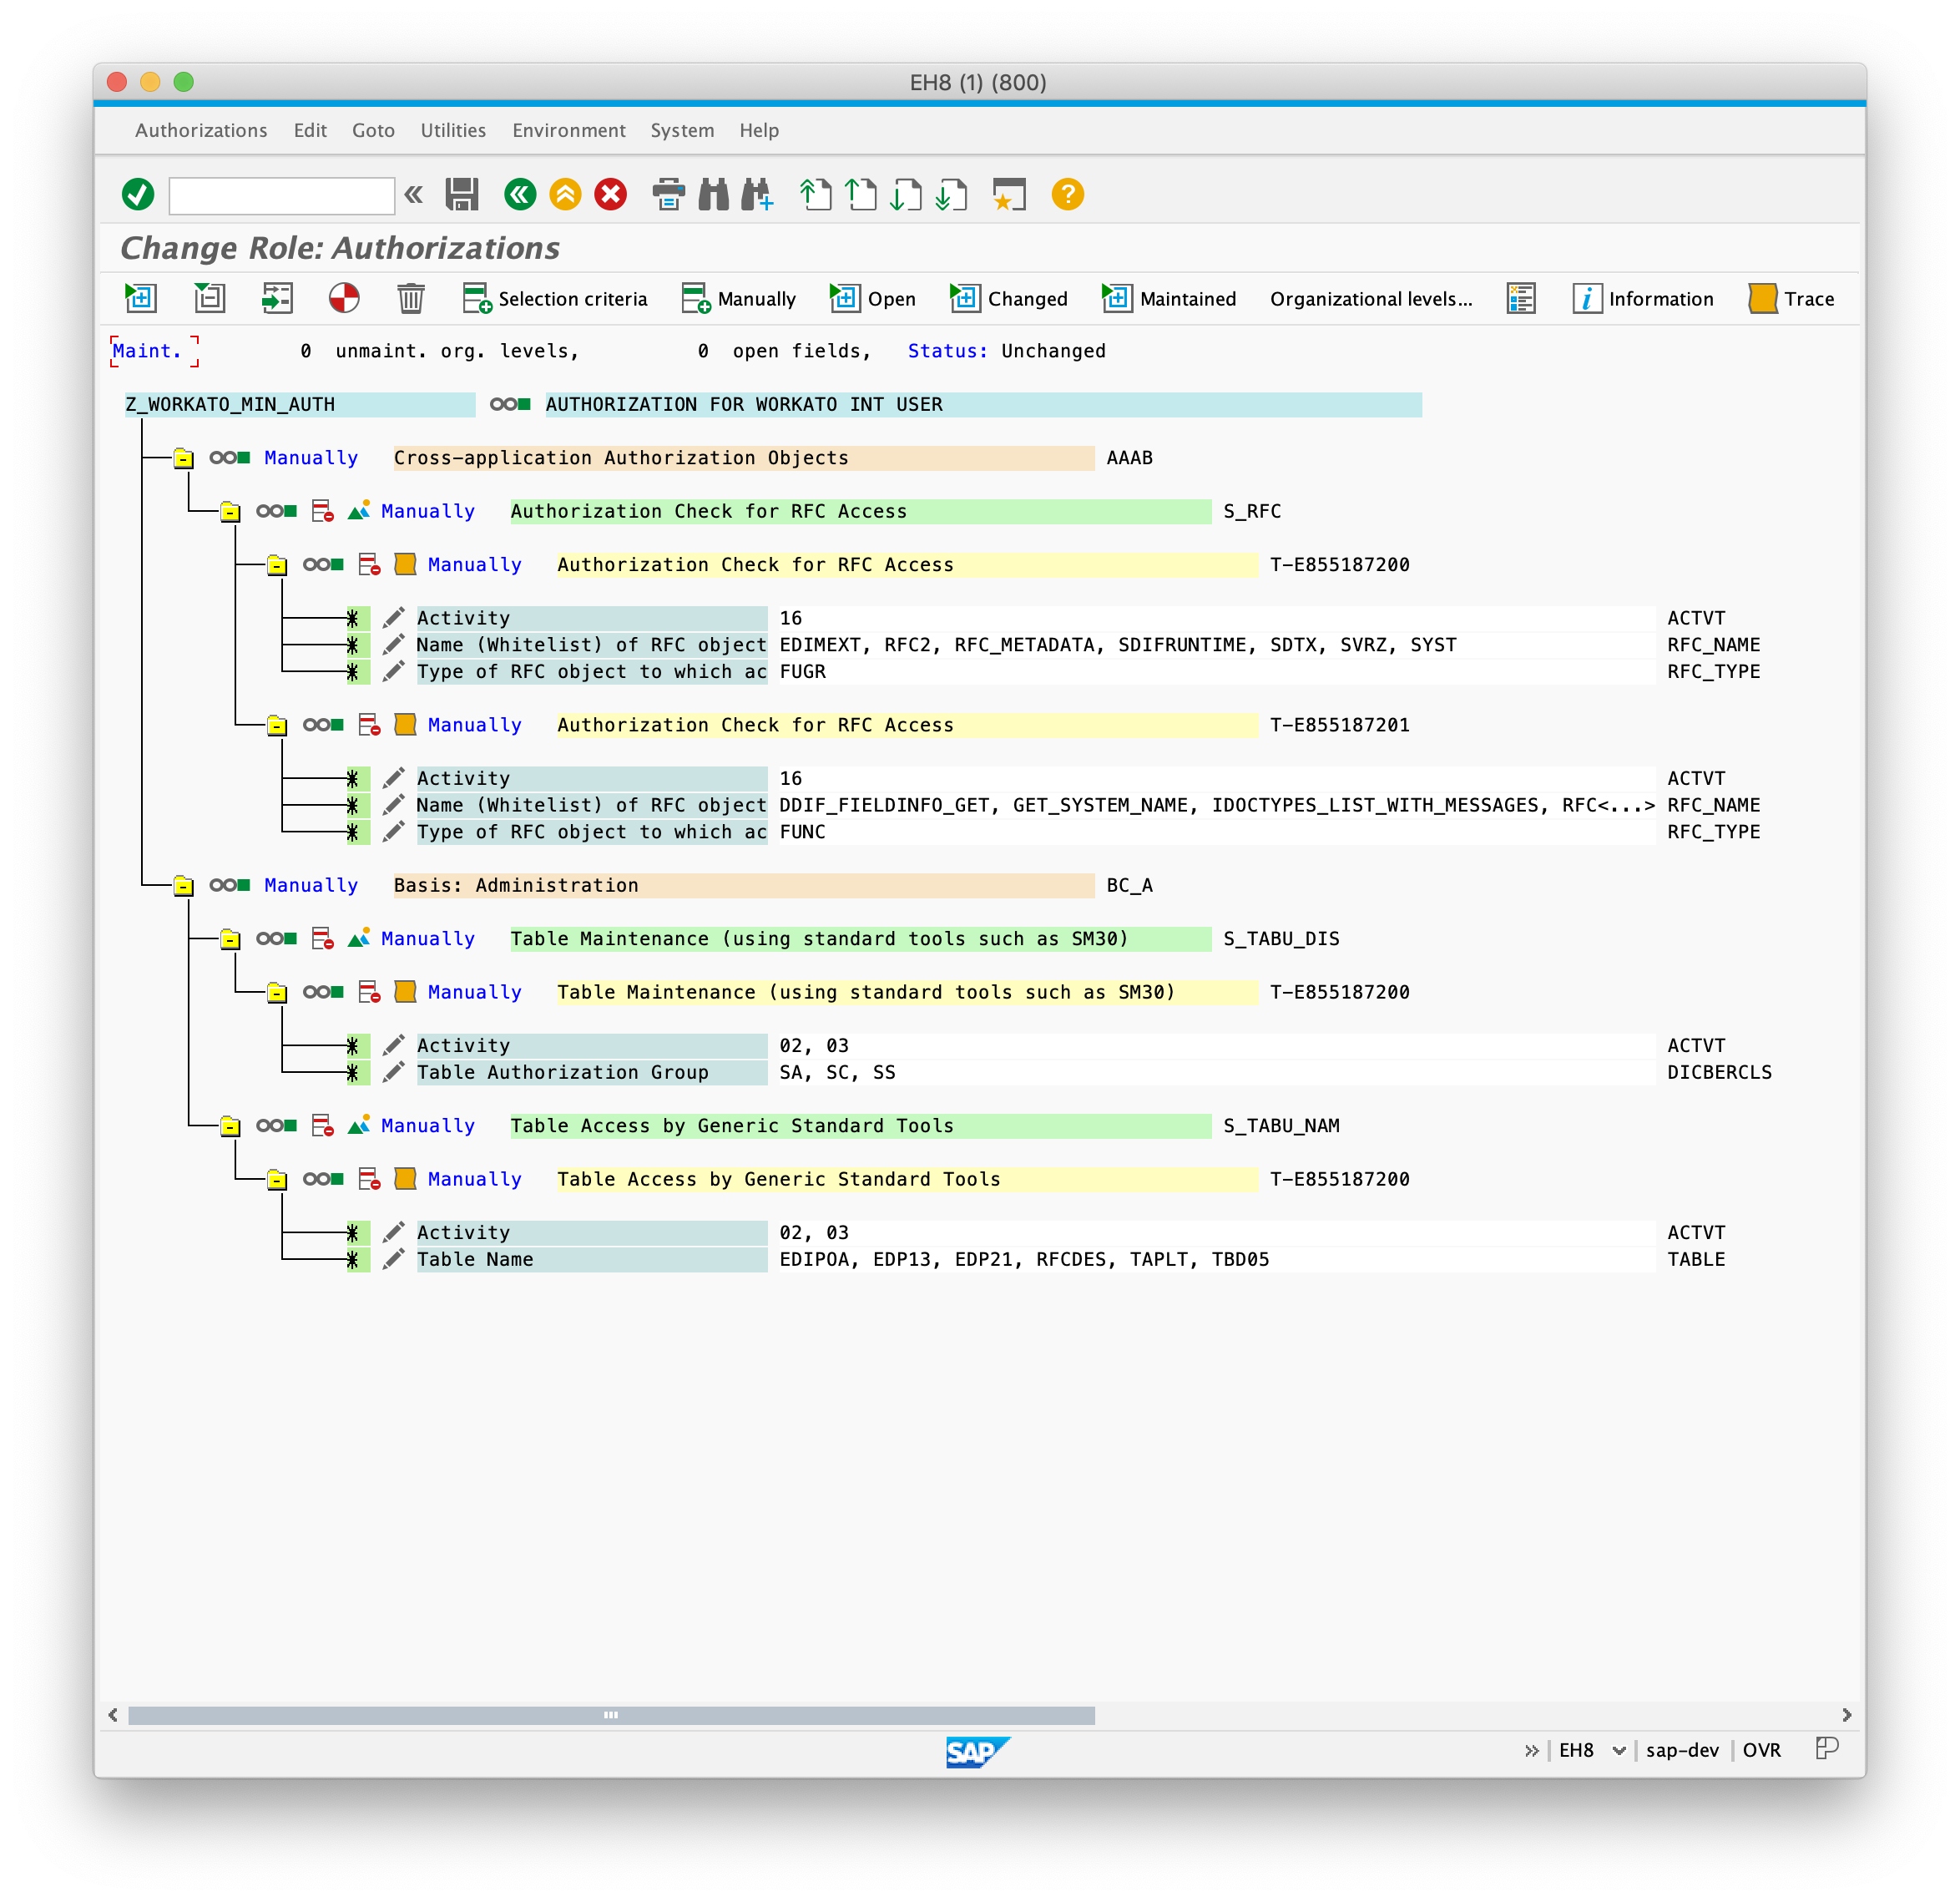
Press the generate button (the white and red circular button in your top bar) to save your Authorization.
# Link your user to your newly-created role
To link your user to your newly-created role:
Navigate to SU01 and edit the user you created in Step 1: Create a new user in SAP using SU01.
Go to the Roles tab.
Provide an Assignment to the role you have just created.
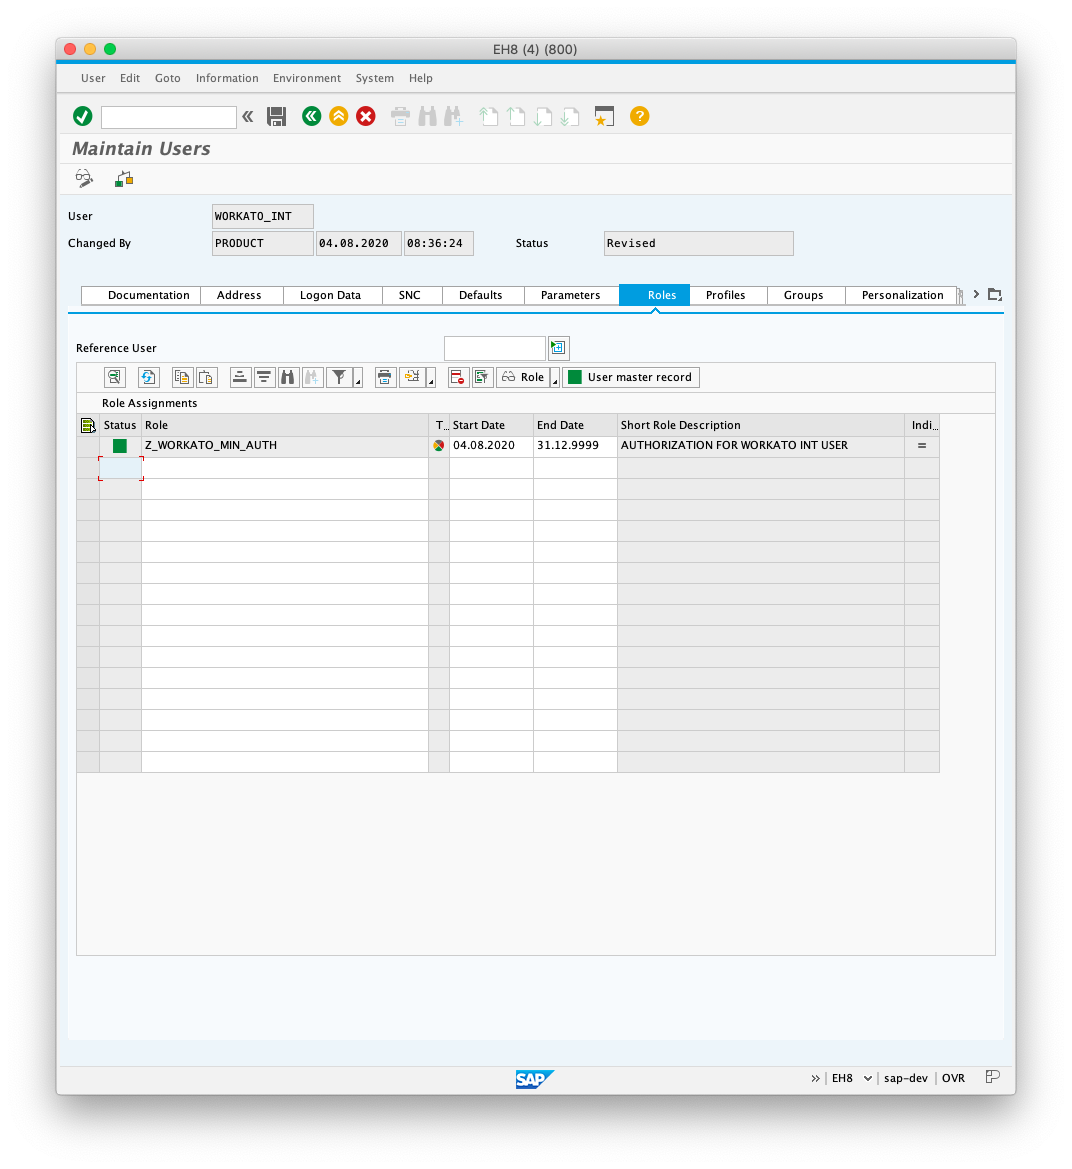
Click Save.
FURTHER READING
To complete your connection to SAP RFC, read the following guides:
Last updated: 4/5/2023, 3:03:46 PM