# Building a HTTP action
After you have setup your HTTP connection, you can now configure HTTP actions. Within the HTTP connector, you have the choice of two actions:
- Send request
- Send request and wait for response (private preview)
The key difference between the "Send request" action and the "Send request and wait for response" action can be found in the table below.
| Send request | Send request and wait for response | |
|---|---|---|
| Request timeout | Up to 120 seconds | Up to 1 hour |
| Response size | Soft response size limit of up to 200MB | Hard response size limit of 100MB |
| Connection types | All HTTP connection types are possible | Connections that use custom SSL certificates or OPA are not supported |
| Job processing | Jobs in the queue will be processed in order | Jobs may not be processed in order |
| Setup | Users can use HTTP wizard | No HTTP wizard (Users can start with the "Send request" action and switch) |
| Access | Send request action is generally available | Send request and wait for response is in private preview. Contact your Workato representative to gain access. |
In most cases, we recommend starting with the Send request action when building. If timeouts do occur, swapping your configuration over to the Send request and wait for response action can be done easily after building your initial recipe.
# Action configuration
The configuration for both actions are the same and you can follow the documentation below to configure free-form requests to any API.
To start, give your request a name to identify it. This also changes the Workato action name at the recipe-level.
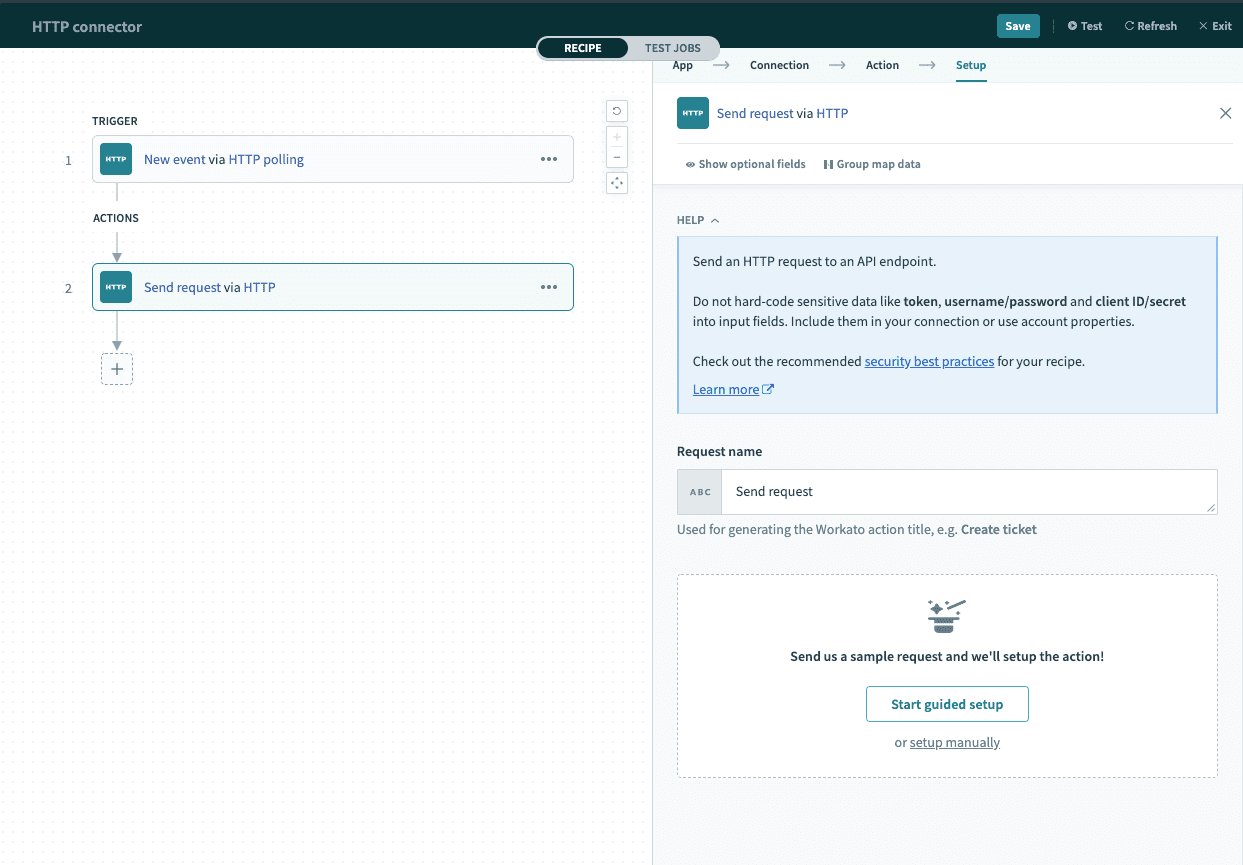 Provide request name
You may choose to use the HTTP wizard by clicking Start guided setup or choose to configure the action manually with the following inputs.
# Input
| Input field | Description |
|---|---|
| Request name | Allows you to provide a human readable description of what this API request does. |
| Request | Contains all information related to the request - Verb, Request URL, Request payload and headers. |
| Response | Contains all information related to the response - Response type, encoding and headers. |
# Output
The output of this HTTP action depends on the response body schema defined in your HTTP configuration.
# Workato HTTP wizard
Workato has a 3-step HTTP wizard that prompts you to make a test request to the API endpoint. This wizard will try to provide a recommended HTTP configuration for your endpoint wherever possible.
Click Start guided setup to begin.
You may exit this setup wizard at any point if you wish to configure the action manually.
# Example HTTP action
We will be going through an example of building a HTTP action using the Workato HTTP wizard - Create venue in Eventbrite.
# Step 1: Provide HTTP method and request URL
To begin, provide the absolute API endpoint you wish to call, and the HTTP method of that endpoint. These should be available via the app's API documentation.
 Step 1: Provide HTTP method and request URL
In this example, we wish to view existing incident records from Service now. When referring to the ServiceNow documentation (opens new window), we see that this API is a GET call with an endpoint of https://<instance>.service-now.com/api/now/v1/table/incident. We'll fill out the fields as follows.
 Configuring HTTP method and request URL
# Step 2: Configure and send sample request
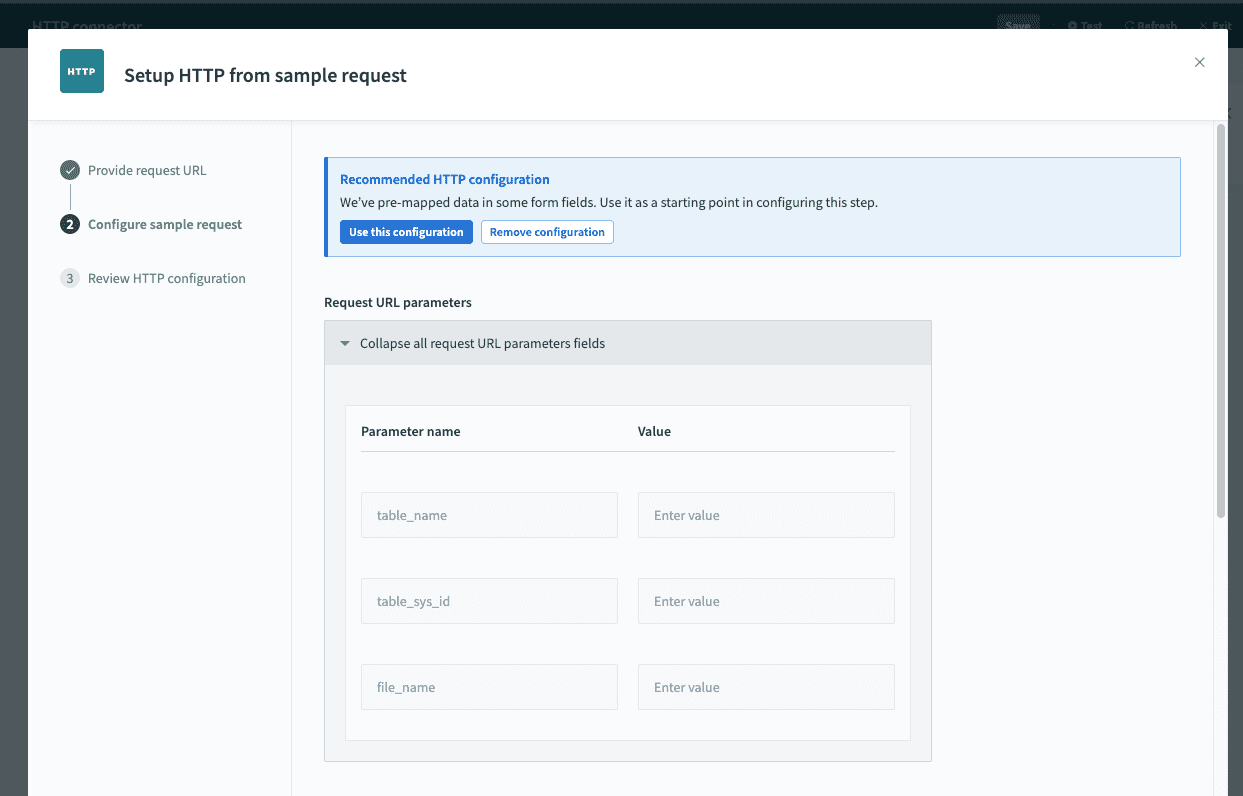
Here, you configure the sample request to send to the API endpoint. For some endpoints, Workato recommends a sample request to send, which you can either choose to customize further or remove entirely to build it from scratch.
You can configure the sample request using the following methods:
- Accept Workato's recommended request settings,
- Accept Workato's recommended request settings and customize further, or
- Remove Workato's recommended request settings and build the request from scratch.
TIP
When using AWS authentication methods - Access key or IAM role auth, you don't need to append any additional authentication parameters. In AWS Documentation, these are often denoted as AUTHPARAMS.
In our example, Workato recommends a sample request body for the ServiceNow endpoint, which we'll accept.
 Step 2: RecipeIQ recommendations for HTTP configuration
In addition, we will add in the field sysparm_limit and set the value to 1. This will limit the number of records to retrieve from ServiceNow.
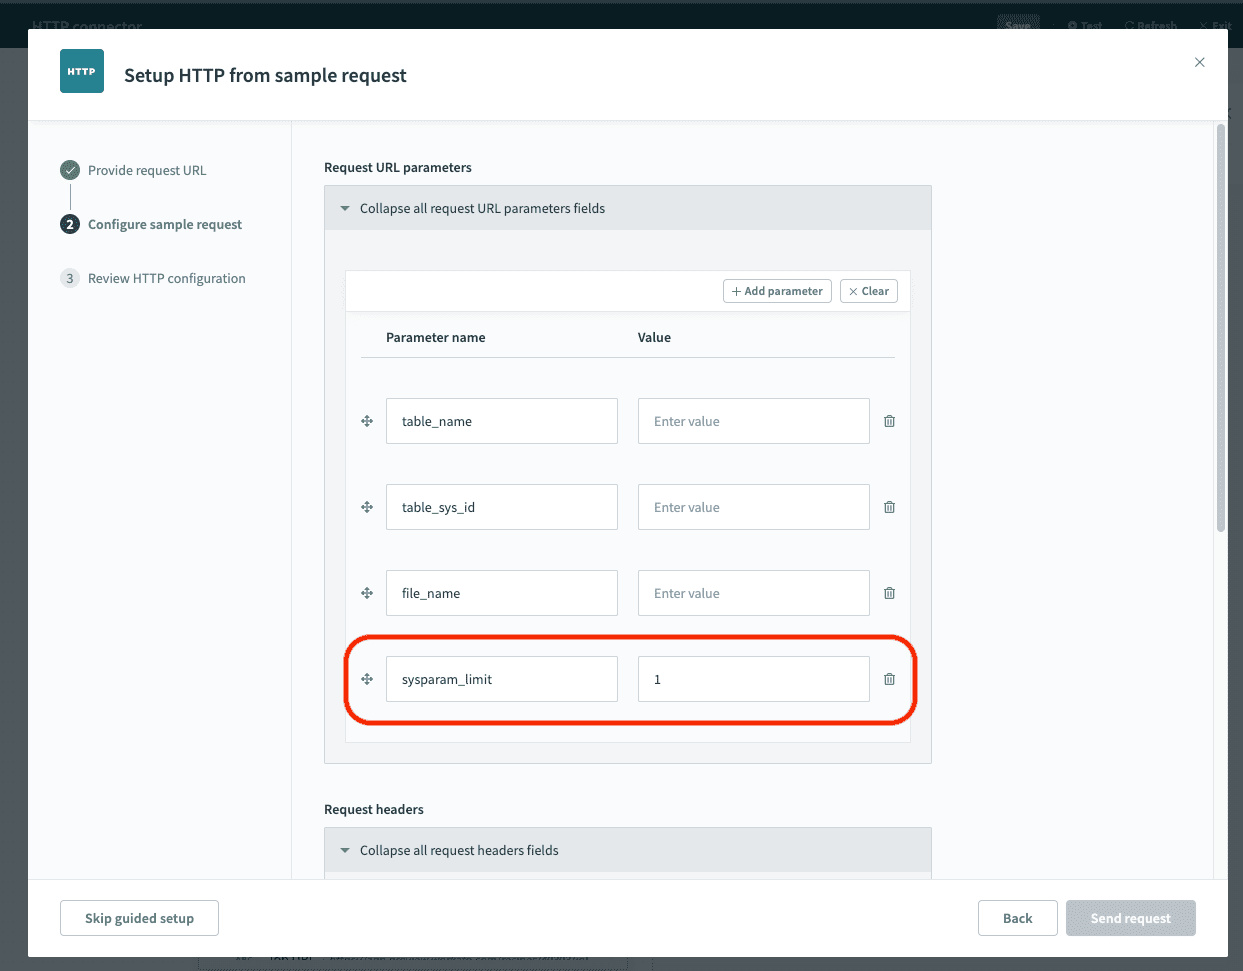 Step 2: Adding request parameter
If you chose to remove RecipeIQ recommendations, you can build your sample request from the following screen.
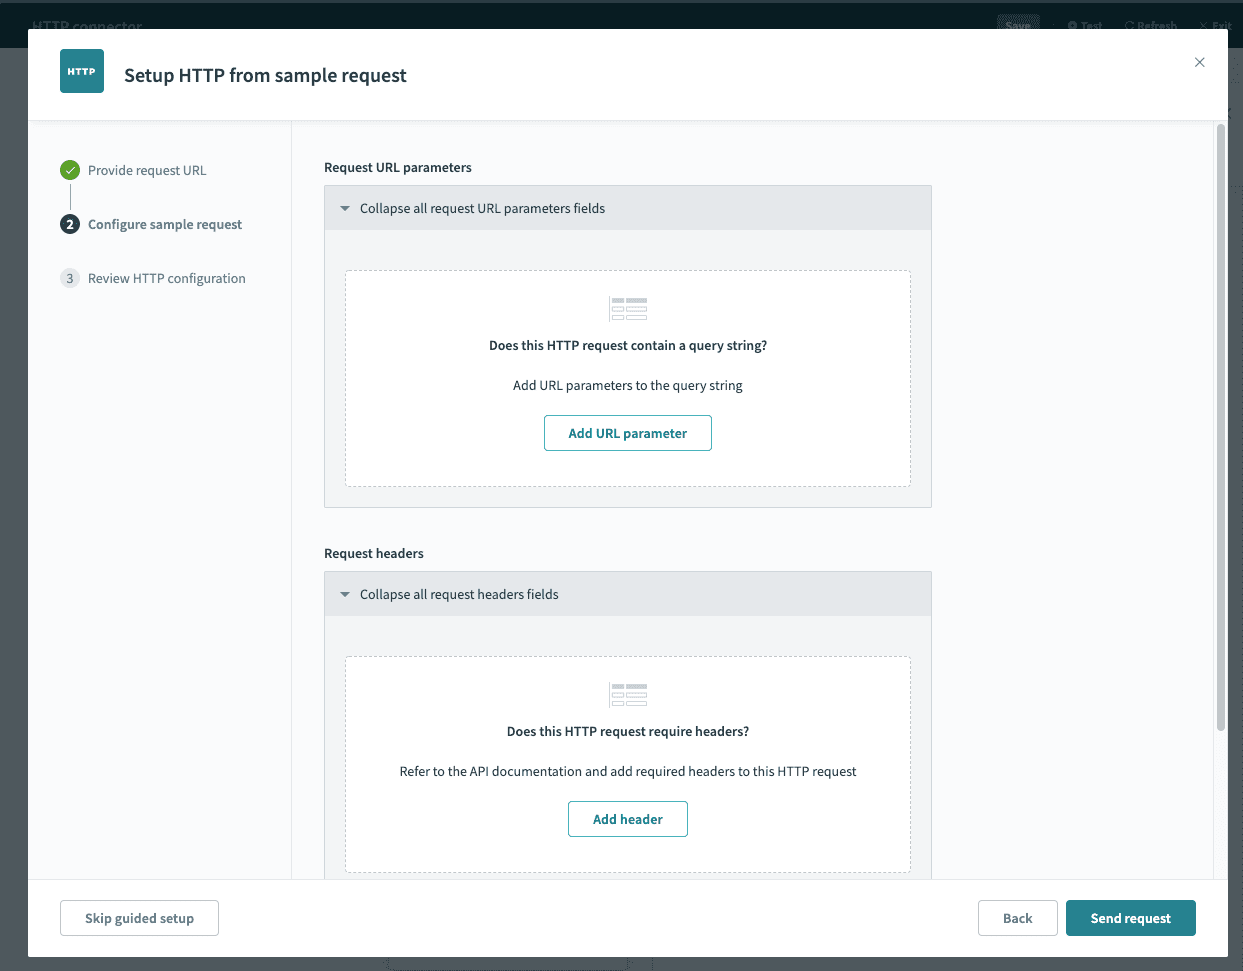 Step 2: Configure and send sample request
You can copy and paste sample request JSON from the API docs to create your sample request body and add required headers.
# Step 3: Review HTTP configuration
With a successful request, we know that:
- the connection has been set up successfully,
- the API endpoint we're sending our request to is correct, and
- we're sending the right set of request body fields for example, all required fields with valid values
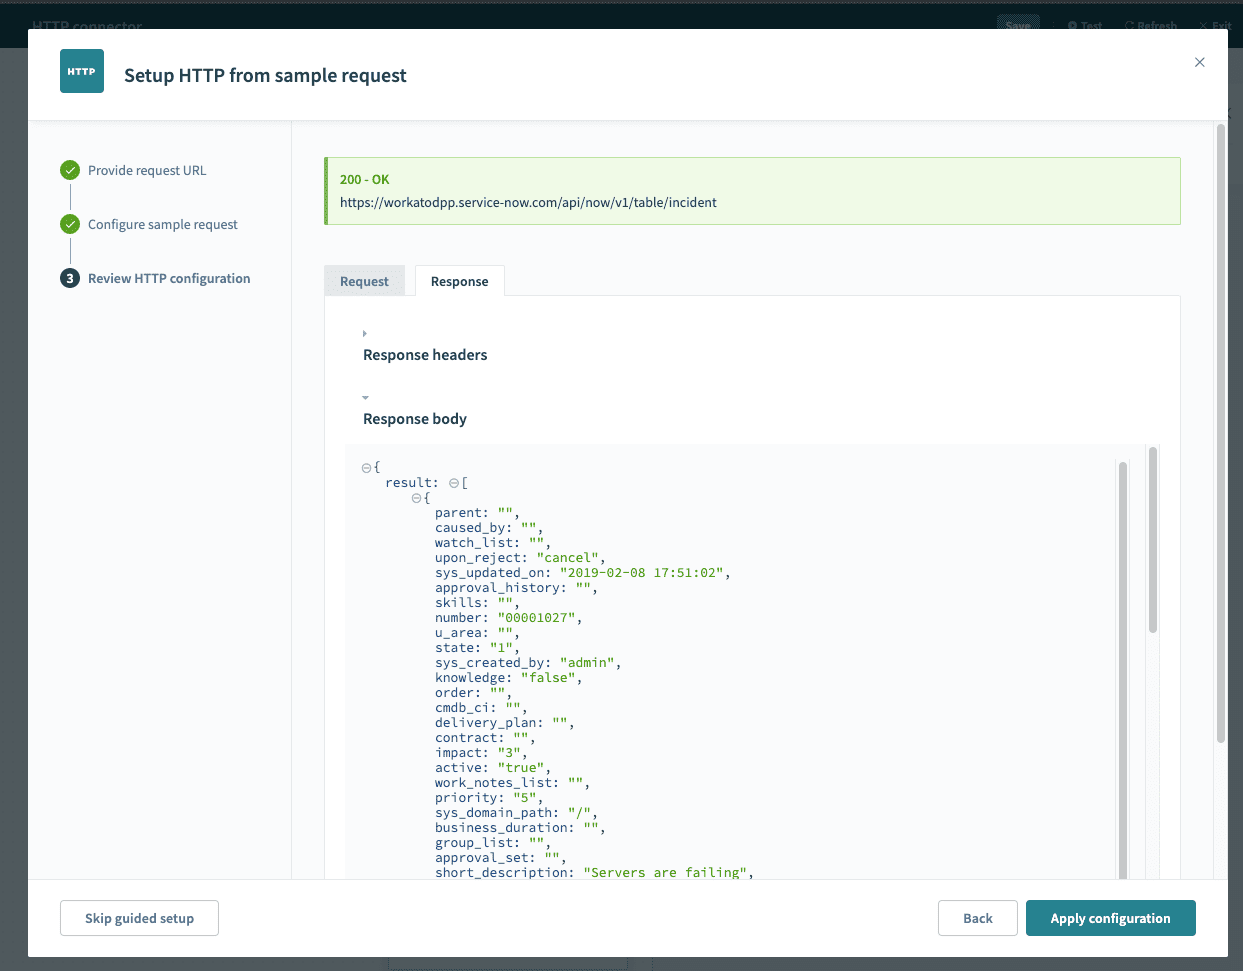 Request successful
We can choose to customize our request further by going back to Step 2 to configure our request and sending another sample request. When we're happy with the configuration, click Apply configuration. The request and response will be saved to the Workato HTTP action, and the HTTP wizard returns you to the recipe page.
 Configuration applied for HTTP action
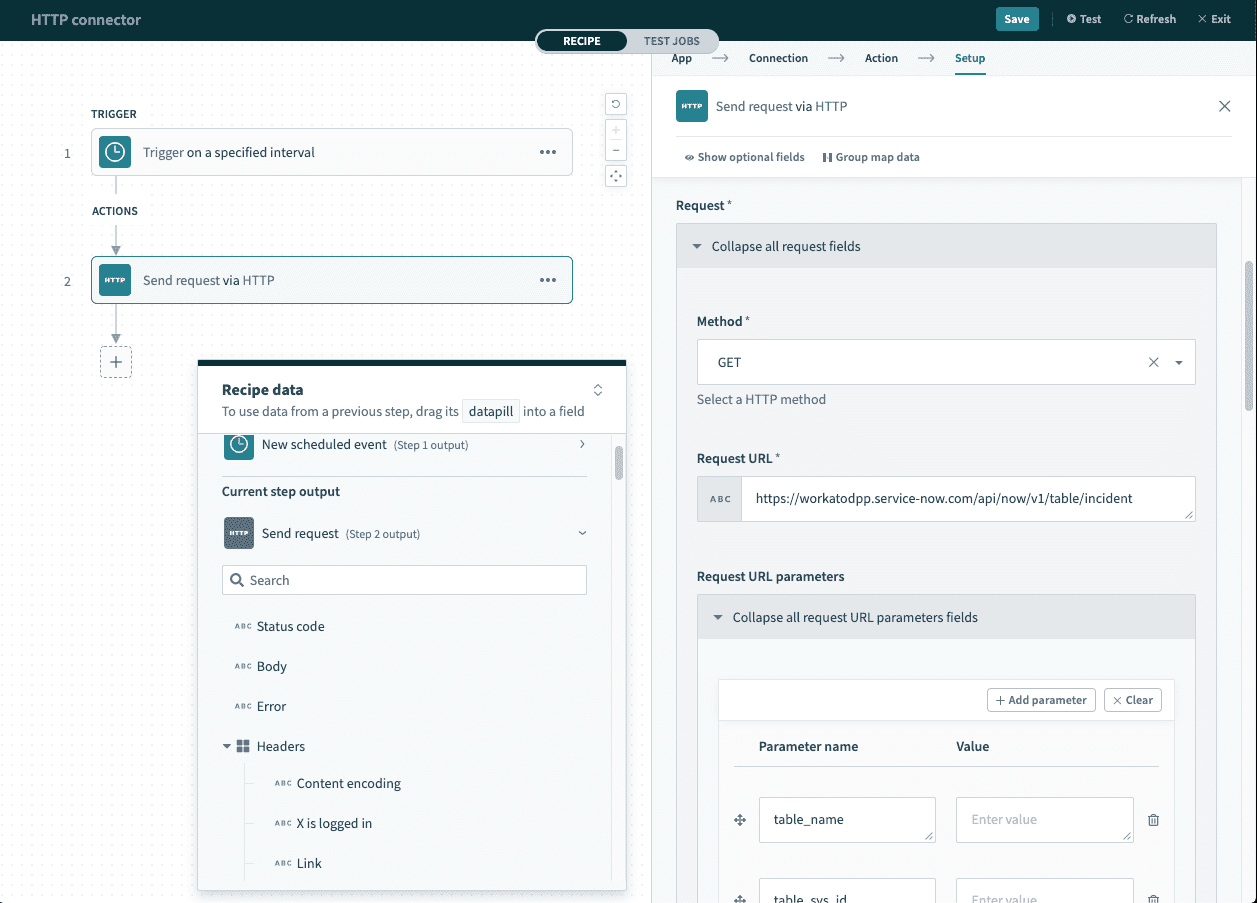
# Final HTTP configuration
We know that this configuration works - now it's time to replace the static values with datapills that hold dynamic values.
This is what the HTTP configuration should look like after I've put in my relevant datapills. This HTTP action is now ready to be used!
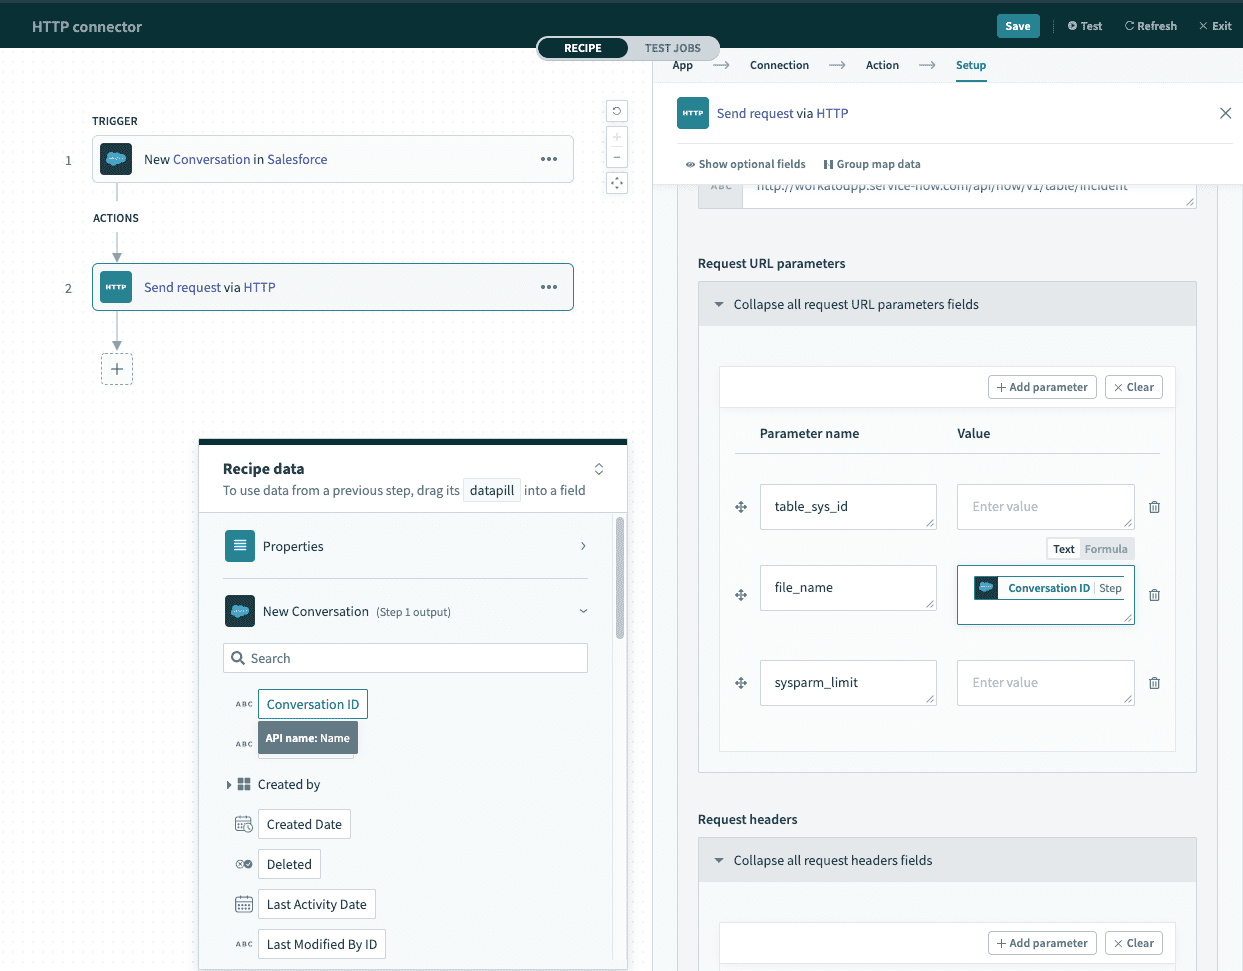 Completed HTTP action
# HTTP setup documentation
You can also browse the other chapters:
Last updated: 11/21/2023, 6:19:41 PM